Getting started with the Metal Cloud
Metalcloud is very easy to operate but it does have some unique concepts. This short introductory tutorial will walk you through deploying a server and retrieving access credentials while also explaining the various Metalcloud concepts.
Before you start make sure you have created an account with us by signing up here.
In the MetalCloud servers (called Instances) are groupped in InstanceArrays. By default an infrastructure is created for you called “my-infrastructure” in a datacenter geographically close to you.
Create an instance array
Click on the
Create your first InstanceArray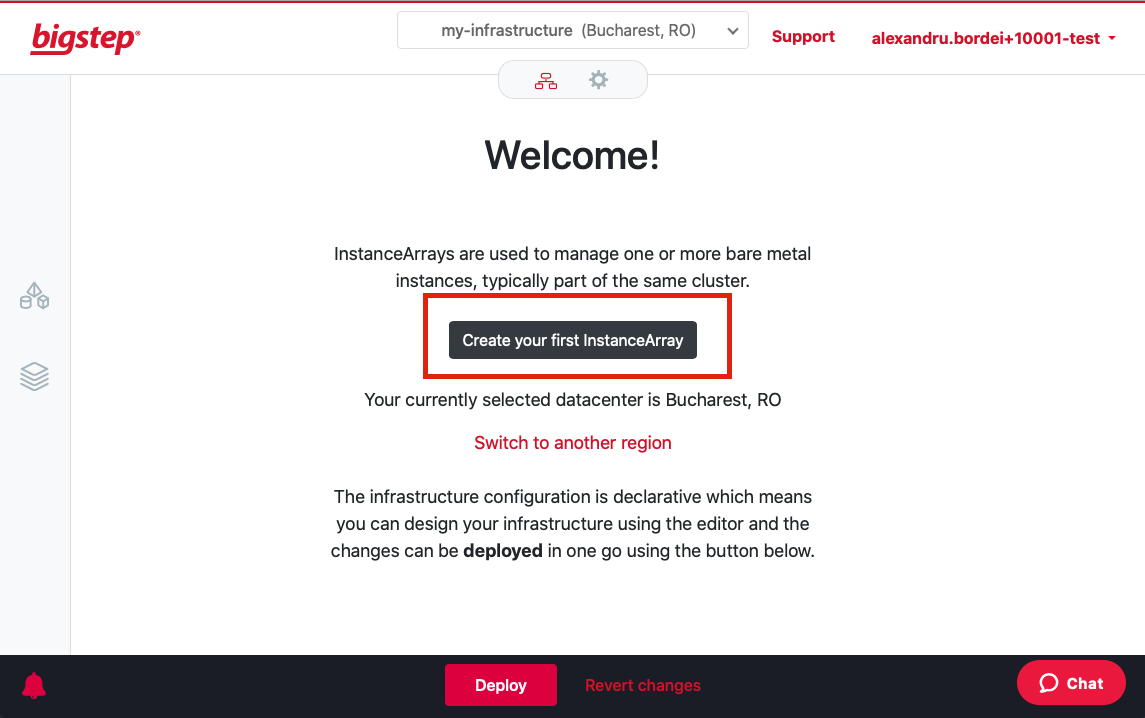
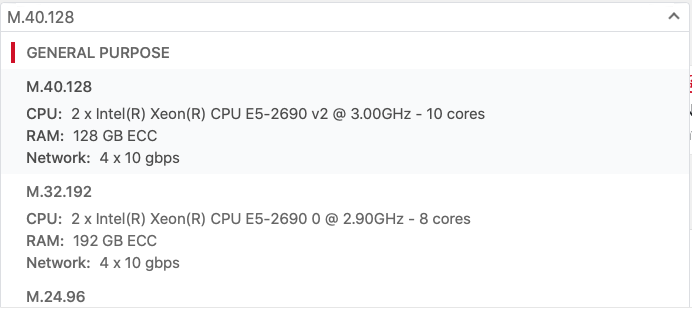
Select a server configuration
Select your type, number of servers, operating system, drive size and boot type. The server will not be deployed now but rather will wait for the Deploy button to be clicked. (step #5)
Certain servers types support deploying the operating system on a local drive (or a collection of local drives in an RAID 1,5,10 array). Local drives do not allow switching the server but are less expensive and carry higher capacities and, if using local NVMes higher performance.
You will notice that a structure has been created on your UI:
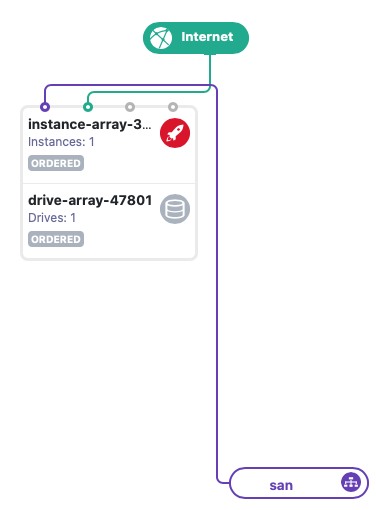
This structure includes both an
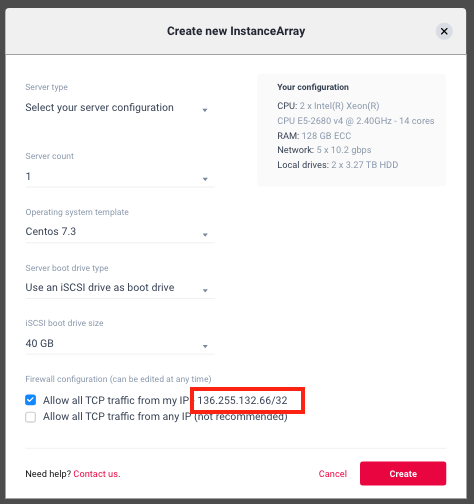
instance arrayand adrive arrayboth with a count of 1. That is normal. If you want to perform further modifications such as firewall rules or selecting another configuration by click on it.Configure the firewall
By default all traffic is blocked. You need to explicitly allow traffic to it. For your convenience by default the interface will enable traffic from your current public IP (assigned by your Internet Service Provider - this could be static or dynamic). You need to explicitly enable additional IPs or ports before you deploy.
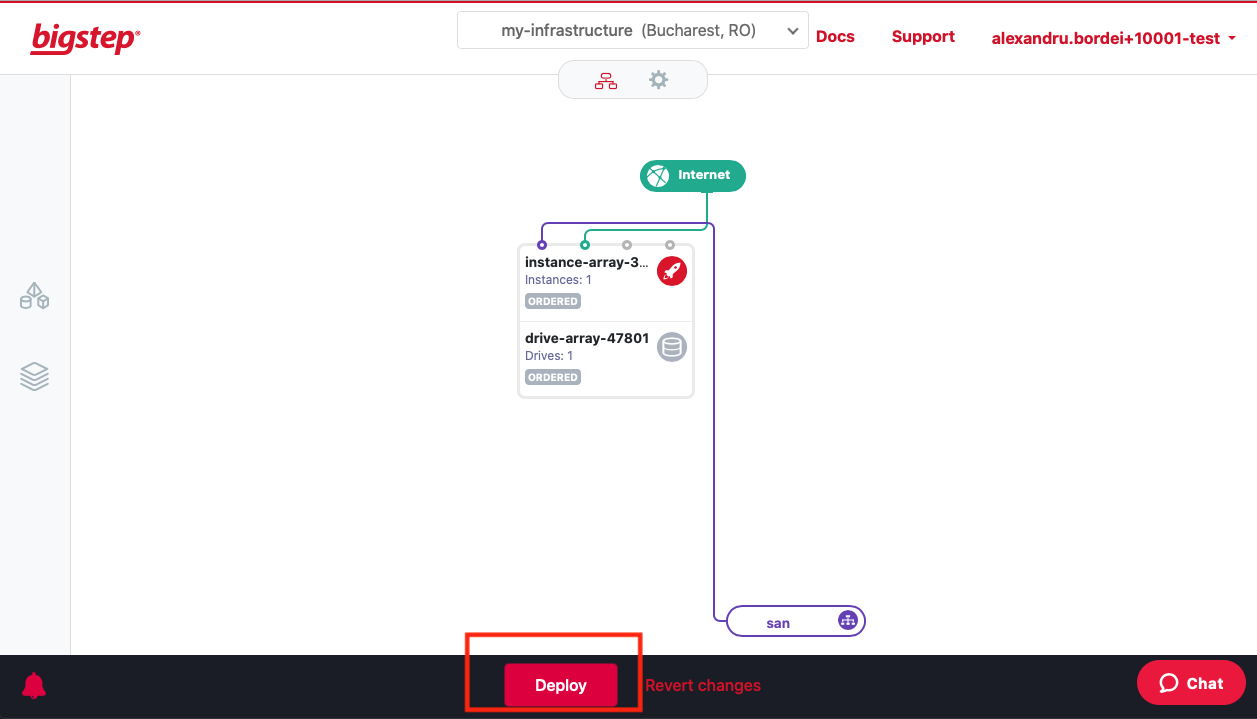
Deploy the infrastructure
Operations in the Metal Cloud are not immediately deployed. In fact they can be reverted until the infrastructure is “Deployed”. Click on the big “Deploy” button from the bottom of the screen.
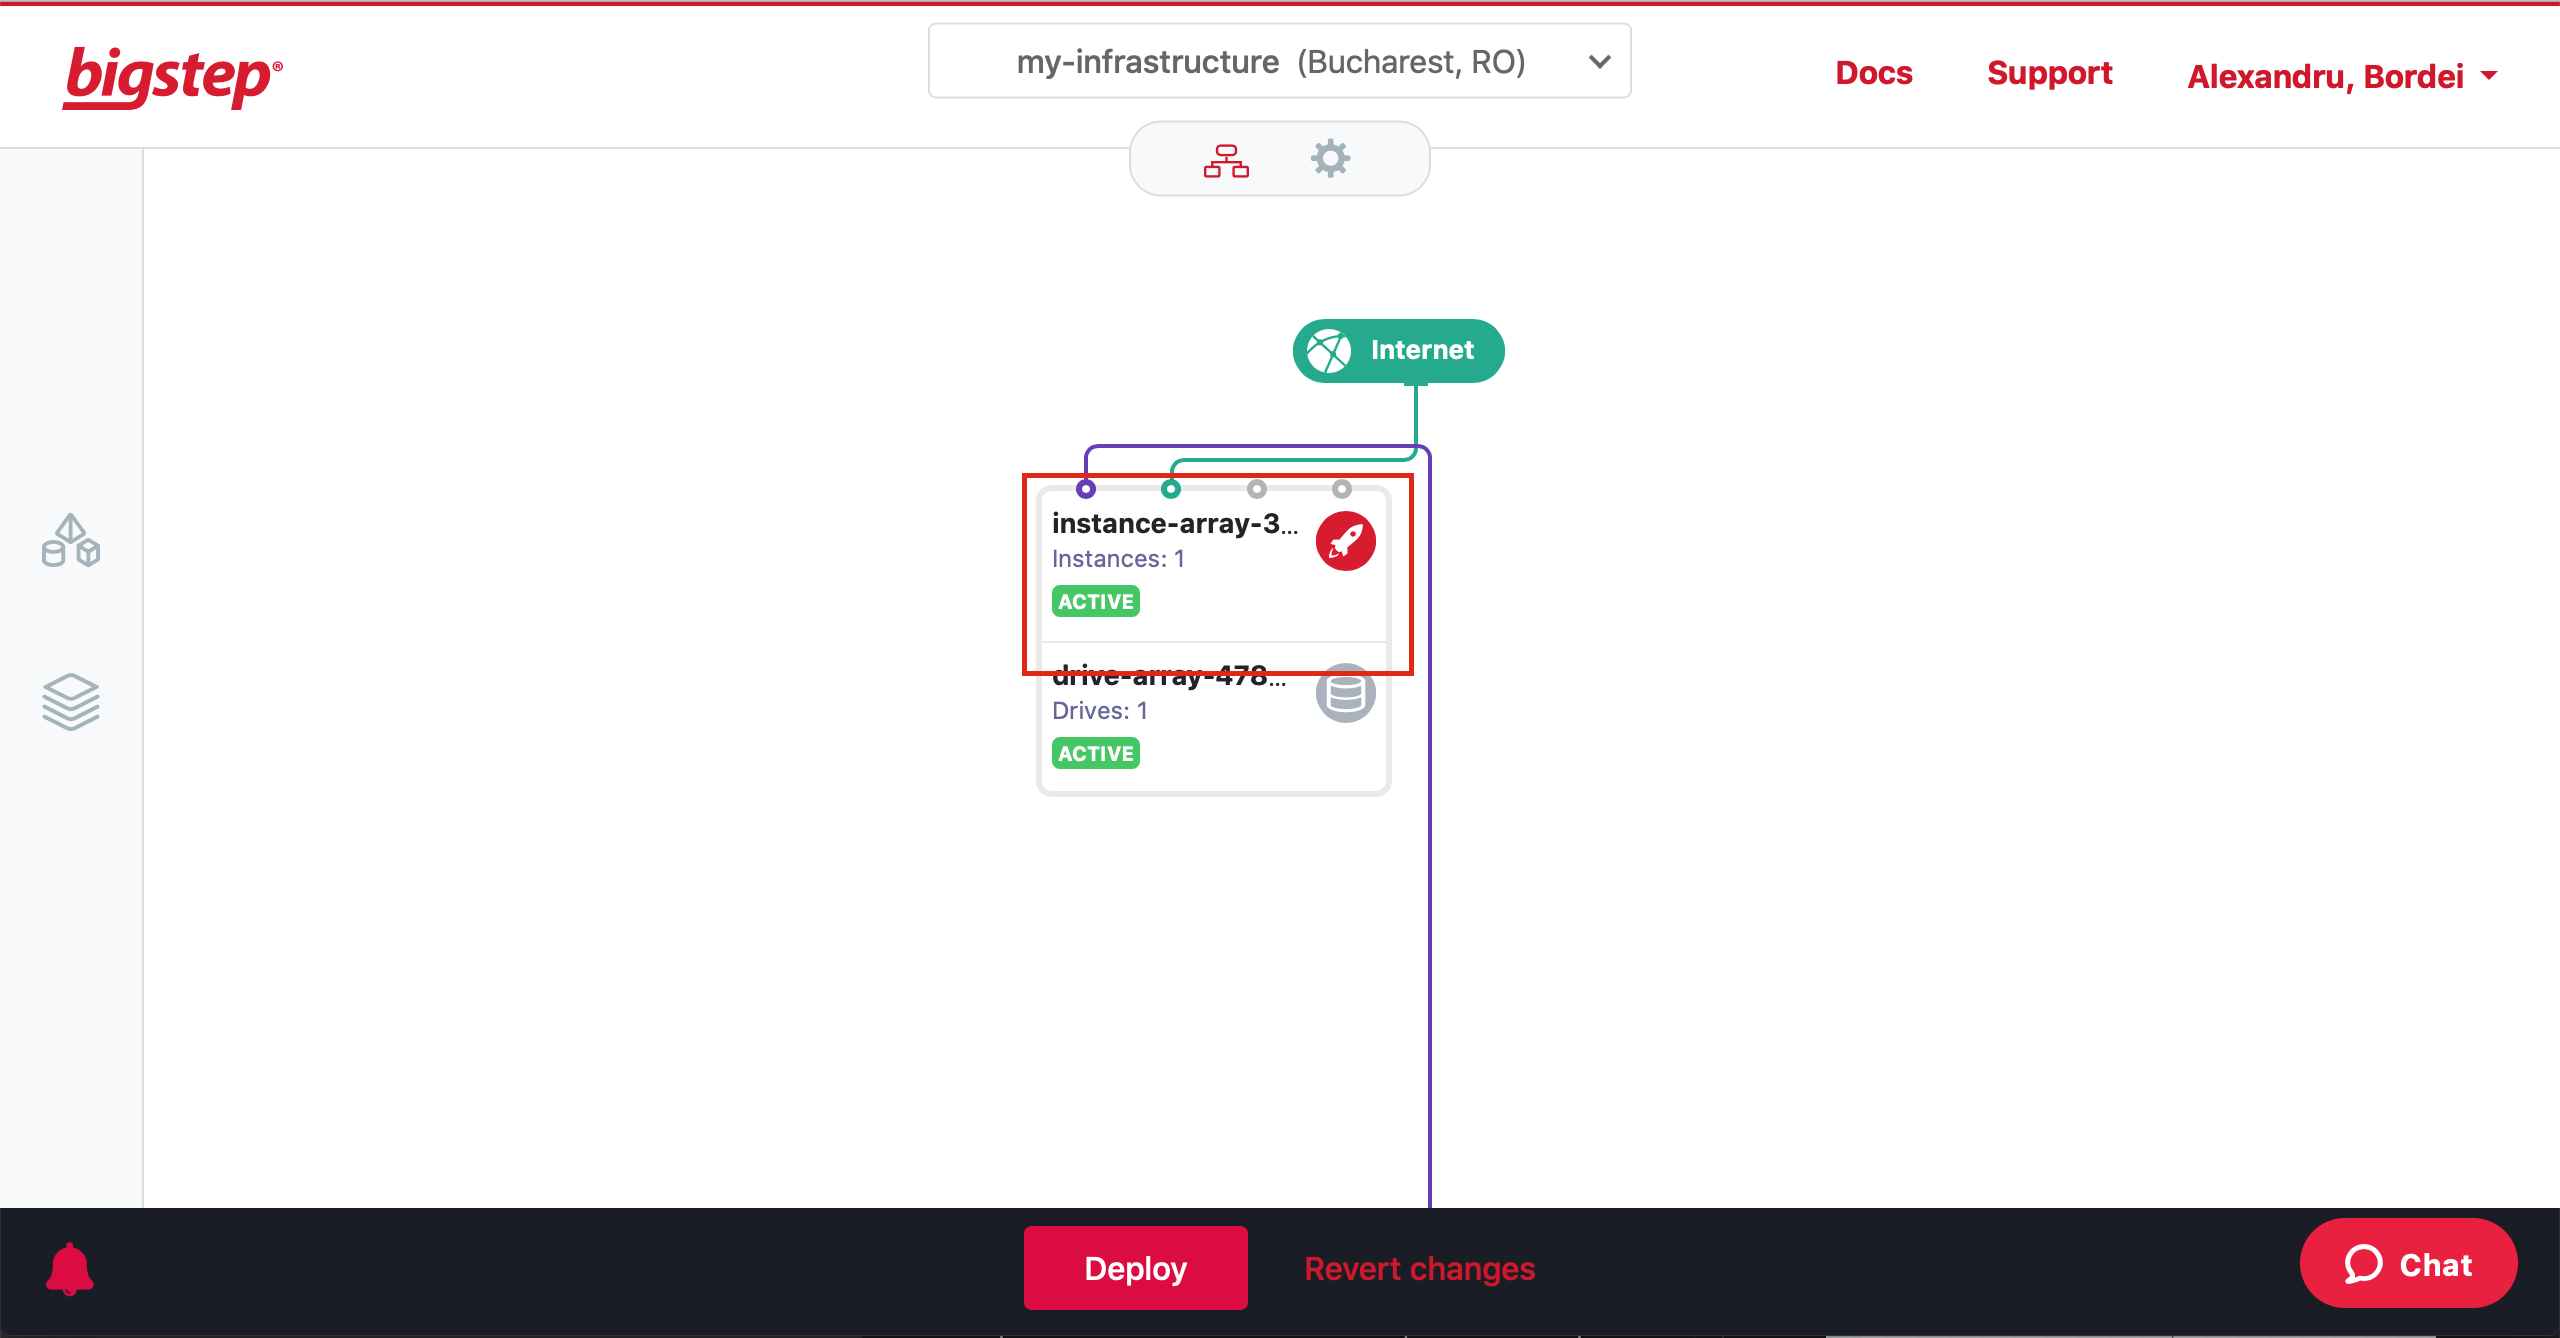
The deploy operation should take between 3 and 10 minutes. At the end of it the instance array will be in an
activestate.Retrieve access credentials
After the deploy the instance array is in “active” state. Click on the instance array:
This will pop-up the access credentials window:
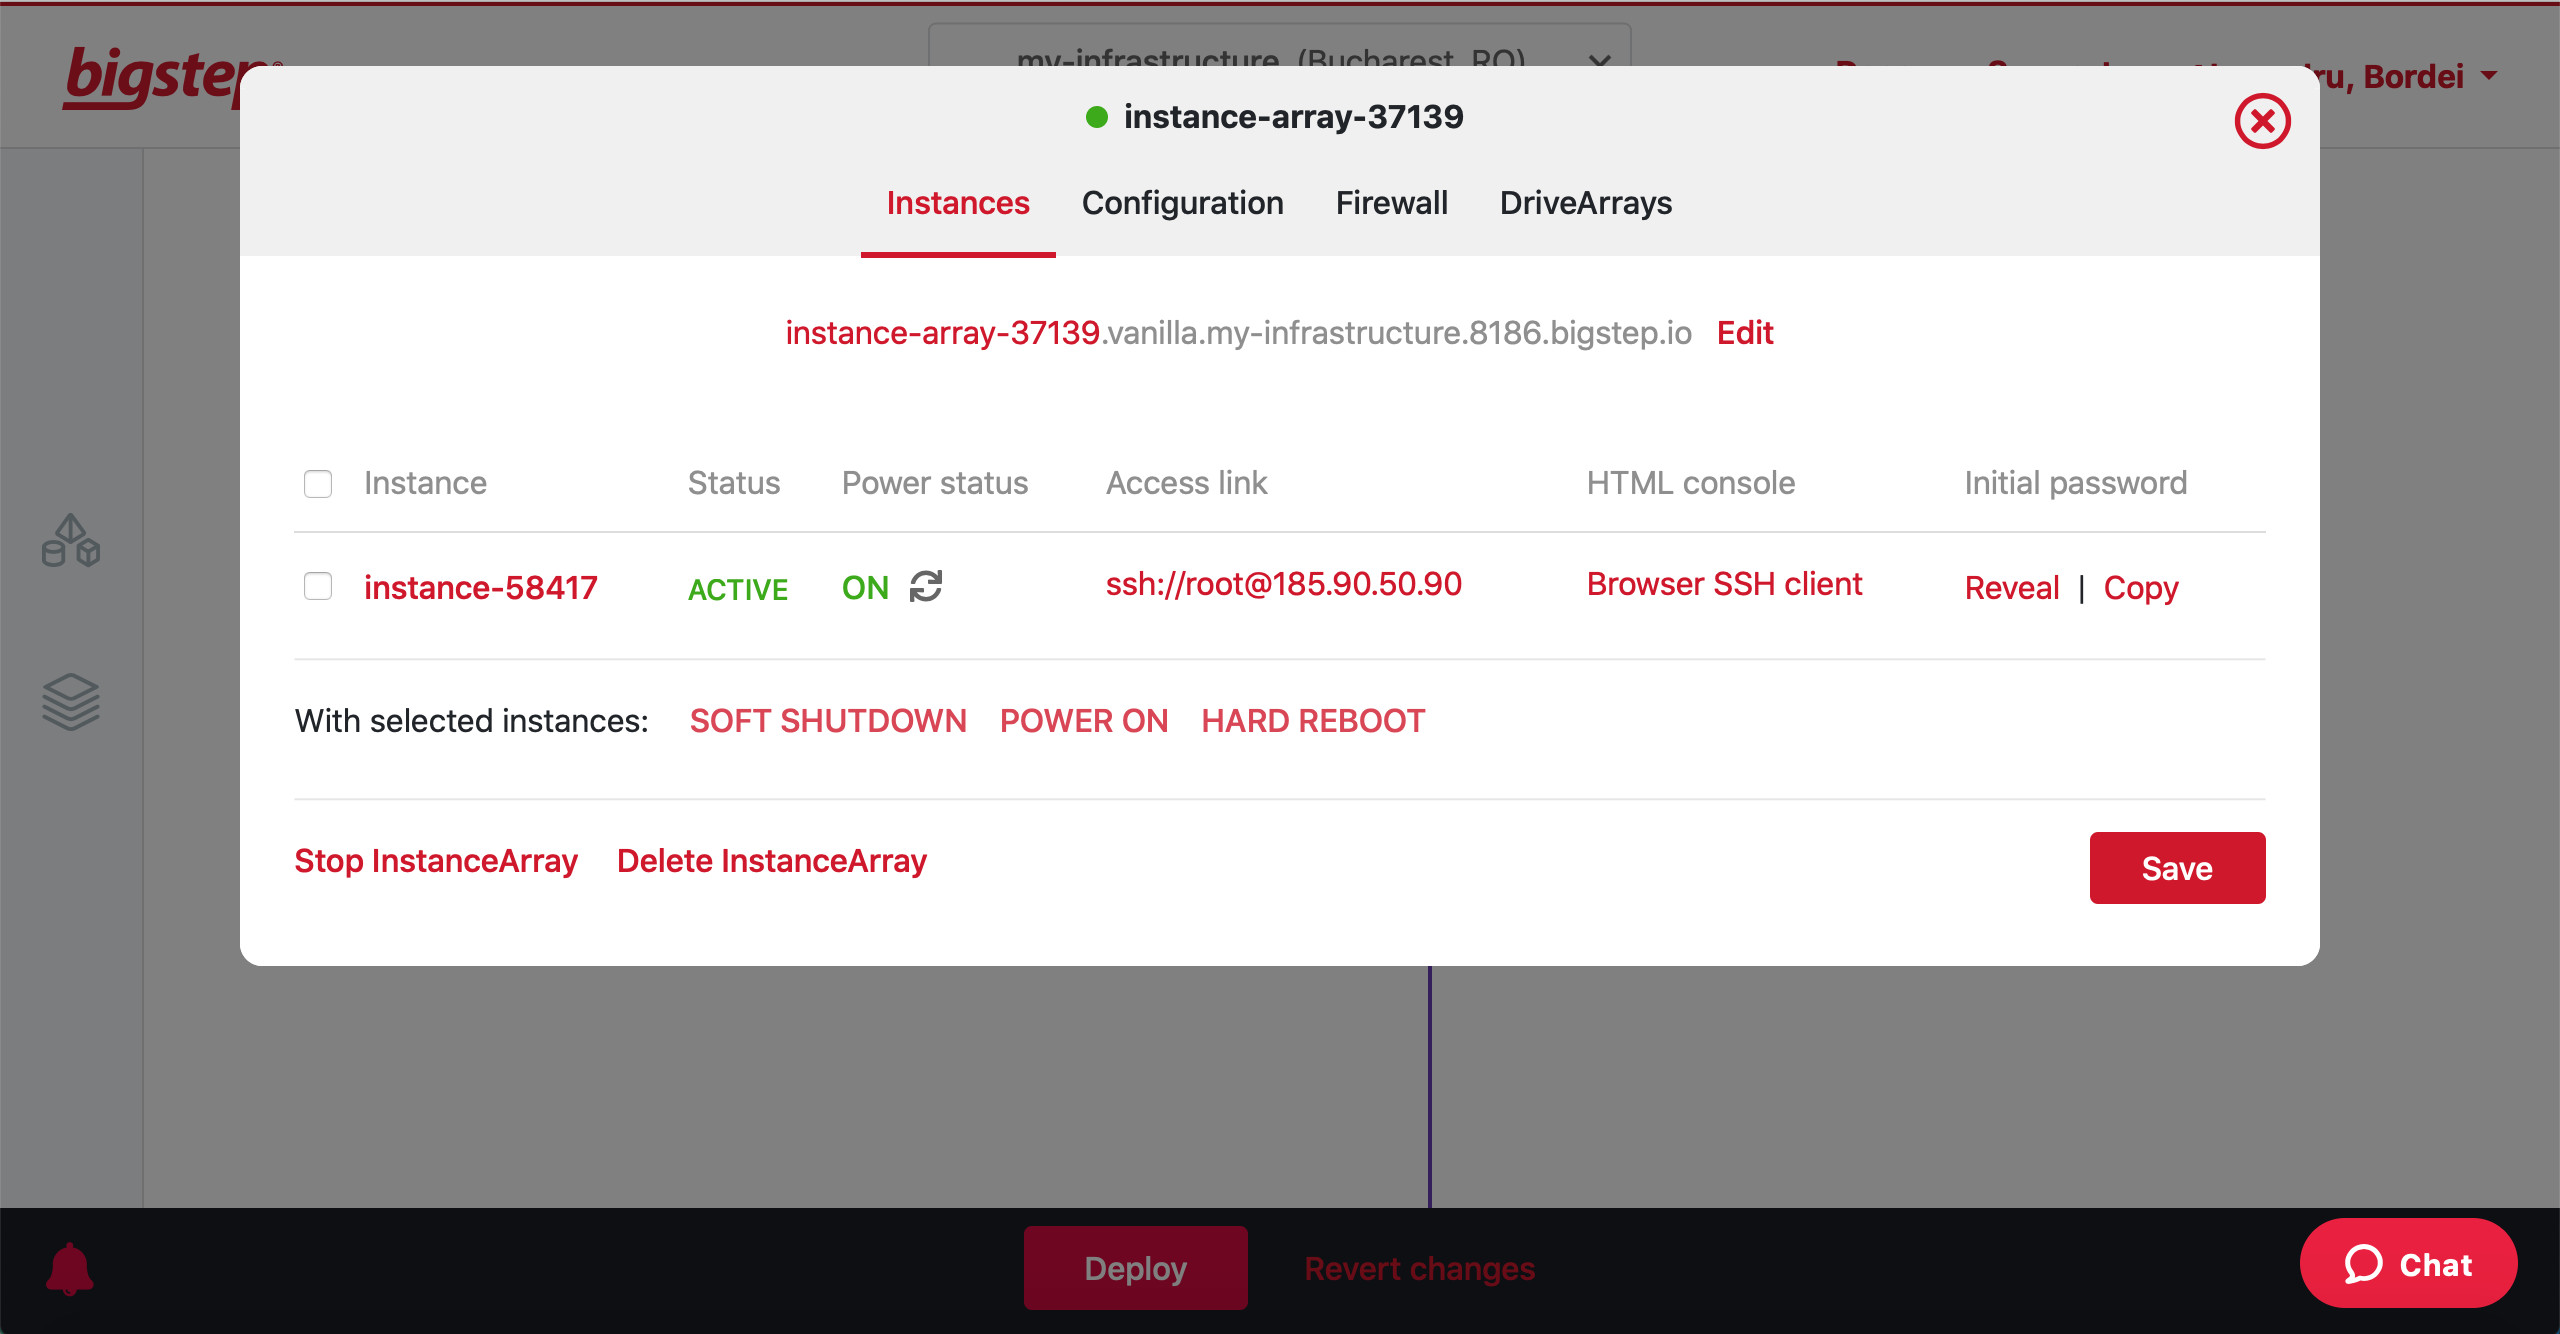
Here you can find, for each instance (server):
- the quick ssh access link
- root password
Clicking on the
Acess linkwill open the default ssh client for your platform. If that doesn’t work use:On Linux & Mac open a terminal and type:
On a Windows client one option would be to use Putty.
- Host:
instance-1234.bigstep.io - Port:
22 - Username:
root - Password:
<use the Reveal button under Initial password>
- Host:
Note: It is recommended that you register your public SSH key in the Account settings section so that it gets automatically added on the hosts at deploy time.
Where to go from here: